
Eduard P-51D Very Long Range: Tales of Iwo Jima, 1/48th Scale, Kit No. 11142
By Phillip Friddell on 16th Jun 2023
Imagine, if you will, that classic Clint Eastwood western The Outlaw Josie Wales, specifically the scene where he tells Chief Dan George “it helps to have an edge”. It’s not that much of a leap to take that line and apply it, as well as the Josie Wales character, to Eduard as a model company. Think about it; Eduard have had their share of failures and lost causes, and they’ve overcome them all to work their way into the position of a leader in the polystyrene model airplane industry. They’re formidable, much as Josie Wales was presented to be and, much like Josie, flawed as well, albeit not in the manner we might expect. You say you don’t believe us? Well…
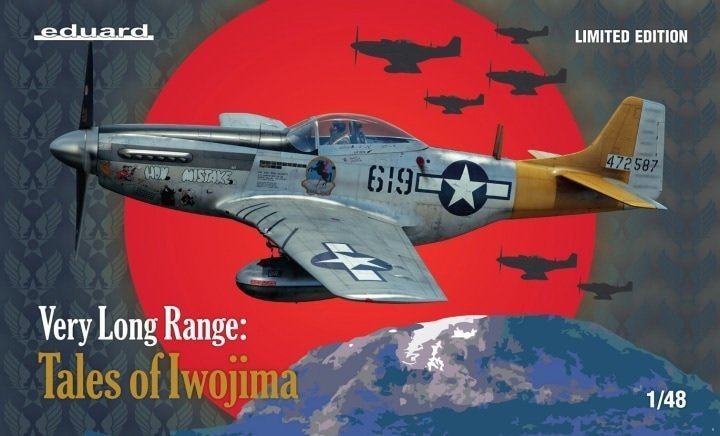
Several years ago Eduard announced the somewhat less than modest intention of issuing 1/48th scale kits of every significant fighter aircraft used by the major powers during the Second World War, which would of necessity include a newly tooled kit of North American Aviation’s legendary P-51D Mustang. That P-51 kit came to pass a couple of years ago and in several iterations, thus allowing us to build accurate models of both early and late P-51Ds, P-51Ks, and F-6/RF-51D photo recon aircraft. Most people would have been content with that achievement but Eduard, the little model airplane company that could, didn’t stop there and the usual special boxings followed in quick succession, one of which is the object of our attention today. The box in question is their VLR (Very Long Range) P-51D Limited Edition kit, offering us the airplane used by the American Army air Forces to escort B-29s to the Japanese home islands from their newly-acquired bases on the recently captured island of Iwo Jima. That boxing was of particular interest to us given our fondness for the aircraft used during the war in the Pacific so we accepted an opportunity to build one of those kits, an event we’d like to share with you today.
Here’s the kit we never thought we’d see; an accurate VLR P-51D with everything required to build the model in one place, no aftermarket required! One of the kit’s decal options included markings for the Mustang flown by Theo Gruici after use by 7th AF ace Harry Crim, a special thing for us since his unit, the 531st Fighter Squadron of the 21st Fighter Group, was the lineal precedent to a unit we saw daily while stationed at Misawa Air Base, in Japan, during the early 1960s. That unintentional tie-in vindicated Eduard’s special boxings as nothing else could, at least as far as we were concerned!!
Let’s get the obvious out of the way right at the beginning. This kit will allow the modeler to build virtually any late-war P-51D or K variation right out of the box. It includes everything we would require to build a superb basic model but also includes three different canopies, three different propeller treatments (accompanied by two different spinners), four different types of auxiliary fuel tanks, the ability to custom tailor the cockpit interior to the specific model being replicated, two vertical stabilizer fairings, two gunsights, three different panels for that “grill” in the nose, assorted bombs and rockets, and multiple antennae fitments. It also includes a set of Eduard’s Brassin’ wheels and tires, plus photo-etch, paint masks, and a lapel pin. Additionally, there are specific markings that allow the modeling of twelve different and highly colorful aircraft used by the 7th Air Force in the VLR role. The kit comes in a fairly large box and that box is full to the brim with parts. It’s a complete package, nothing else required if we don’t count paint.

Here’s a shot of the other side of the airplane. That plastic is riveted, but the rivets are petite and largely unnoticeable unless you’re looking for them.
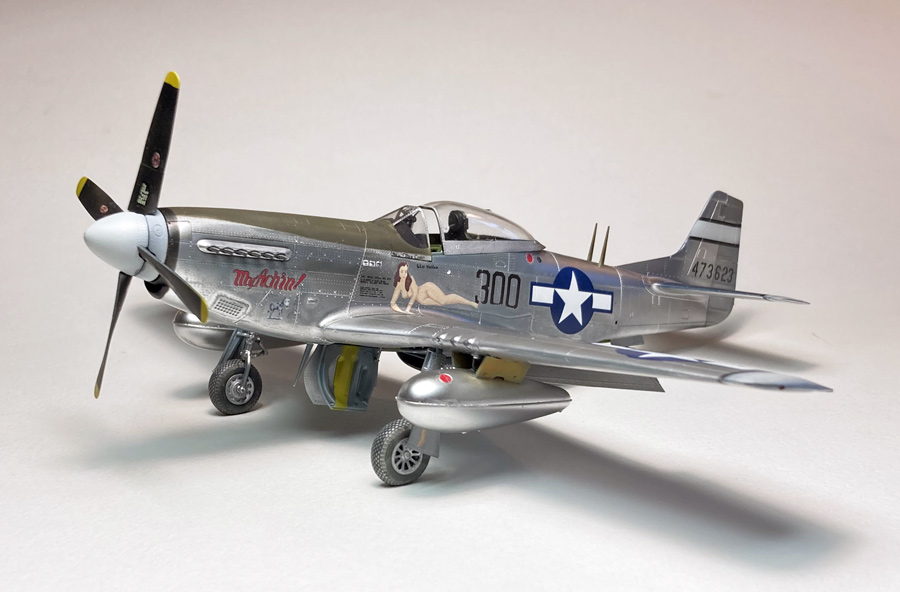
The scale fidelity of this model is almost incredible and stands out even when compared to other recent kits produced by this manufacturer; a veritable tour de force. The kit isn’t merely good. It’s superb, and every one of those twelve different markings is flagged in the instructions as to which parts to use for its recreation. It’s a show-stopper, this one, and the model it produces sure looks like a VLR Mustang once it’s completed!
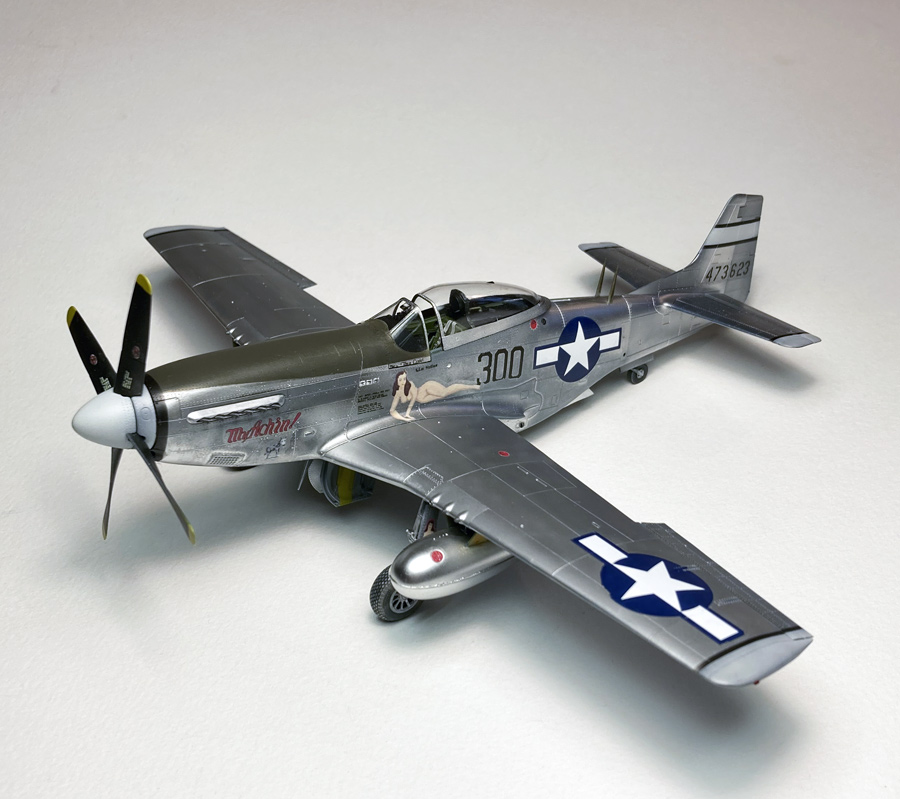
Note the sway braces included for the 110-gallon VLR tanks and the twin antenna masts for the AN/ARA-8 VHF “Uncle Dog” homing adaptor gear fitted to this aircraft. Eduard did their homework!
The kit isn’t without issues, however, and they’re worth mentioning because this model, as good as it is, may or may not be the one for everybody. We didn’t encounter anything problematic during the course of the project, but then we’ve been doing this for a while. Someone new to the hobby might encounter a few stumbling blocks during the course of the kit’s construction, which makes certain parts of that construction worth mentioning. That gives us a perspective of sorts: The kit is great, but what you produce from its parts is entirely up to you and you’re going to need some skills.
First and foremost, there are a lot of parts in this kit, even taking into account the fact that many of them provide for the kit’s various options and not all will be used on any particular model. Further, some of those parts are tiny to say the least, taking the notion of 1/48th scale fidelity to a whole new level. Then there’s the component fit, which is about as good as that sort of thing can get but with a significant caveat—like so many contemporary models the various parts either fit or they don’t and mislocating a part in step 2, for example, can make assembling something of significance in a later step problematical in the extreme. The kit’s parts require proper cleanup and pre-fitting as you build or disaster may well be in your future. Magnification, something like an OptiVisor, can be extremely helpful when working with this kit.
Other things to watch for include the mounting holes in the lower wing which require opening up if you plan on fitting the kit’s rockets (or the Brassin’ rocket stubs Eduard have thoughtfully included); they’re molded where they should be but are not mentioned in the instructions although they are shown there, which is a problem since those locations have to be drilled out prior to assembly of the wing! The tailwheel assembly has a “soft” fit into its bay and the attachment of the actual tailwheel to its strut is very much to scale and therefore somewhat fragile, while the main landing gear struts suffer from attachment points best described as vague and nebulous. The flaps are to be mounted in their fully deployed position, which isn’t particularly correct for the Mustang even if the model is replicating an airplane that has been sitting for several days. There’s a bottom line to all of this: Work slowly and precisely and pay attention to what you’re doing and you should encounter few if any issues. Jump right in and forge boldly ahead without forethought or planning and you may well end up binning the model. We think there’s an obvious path as far as basic construction is concerned, but the choice is yours!
Then there are the long range fuel tanks that give this model so much of its personality. They’re an item that can prove frustrating to build up due to the requirement for installation of their sway braces, but there’s an easy way to do it. No matter whether you choose to assemble the tanks first or attach the braces prior to their assembly (the tanks have flanges around their circumference so the construction seam will be hidden either way), look for the barely visible locating marks on the upper tank sides that show where the braces are supposed to go. Brace the tanks so they can’t move, locate the braces where they belong, then wick in some Tamiya Extra Thin/Extra Fast or similar and give the resulting assembly a few seconds to set up. Those tanks are handed so be aware of that and set them appropriately when viewed from the front while you’re getting everything into position and then, when the cement has almost cured, place the tanks on their pylons and make any required adjustment to the sway braces. Paint and decal once everything on the tanks has dried or cured, then permanently install on the nearly finished model. It’s honestly more difficult to describe than it is to do and, once again, patience is your friend!
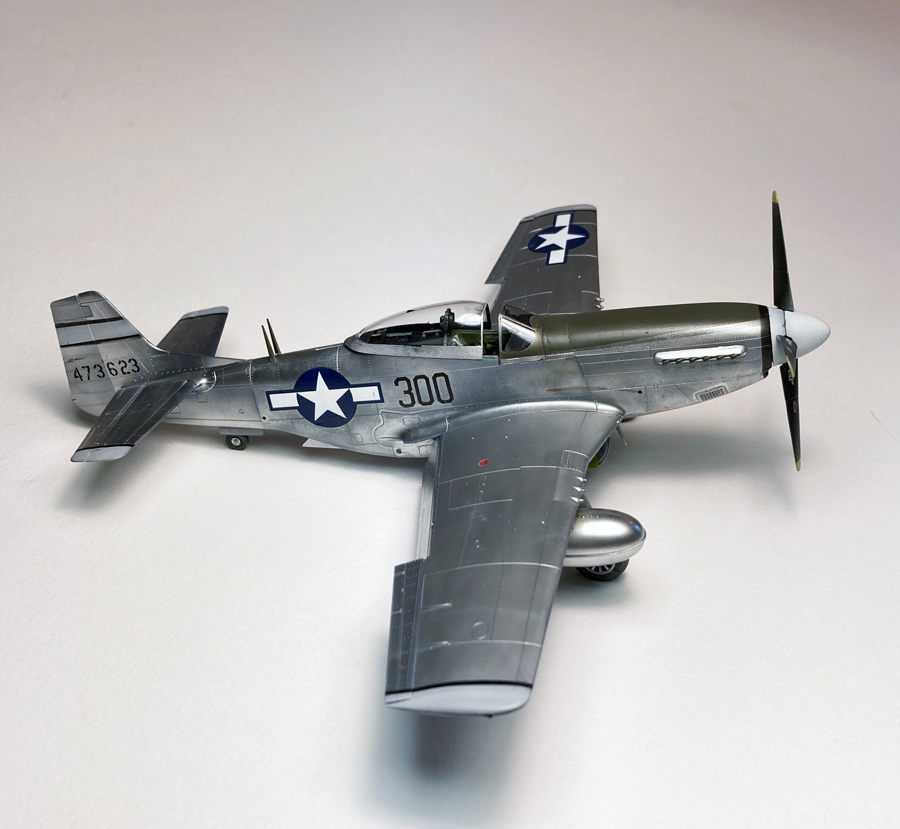
Wartime P-51D wings were puttied and painted silver at the factory, while the rest of the airplane was left in natural metal. Eduard’s instructions illustrate that feature so there’s no mistaking what’s painted what. Follow the directions and Bob’s your uncle!
The kit’s decals are pretty amazing as well, and with twelve different markings possibilities there’s little if any need for aftermarket, but there’s a potential problem there for the unwary. A while back Eduard went to a new decal system, either by accident or by intent, and it’s one full of pitfalls regardless of the modeler’s skill sets. They’re waterslide decals and in that regard they work just like any other sticky that uses that system, but they have a carrier film on TOP of the decals, quite unlike anything we’re used to. In theory having that film on top allows us to apply the decals and let them sit for a while (we used 24 hours), then gently peel off the film completing a process that results in markings that well and truly appear to have been painted on, but that’s not a 100% thing no matter how fastidiously the modeler applies the decals. In short, sometimes they work and sometimes they don't. We like them a lot, except for when we don’t like them at all! (As an aside, we’re told you can also wipe down the cured decals with mineral spirits to remove that pesky film but we haven’t tried it yet.)
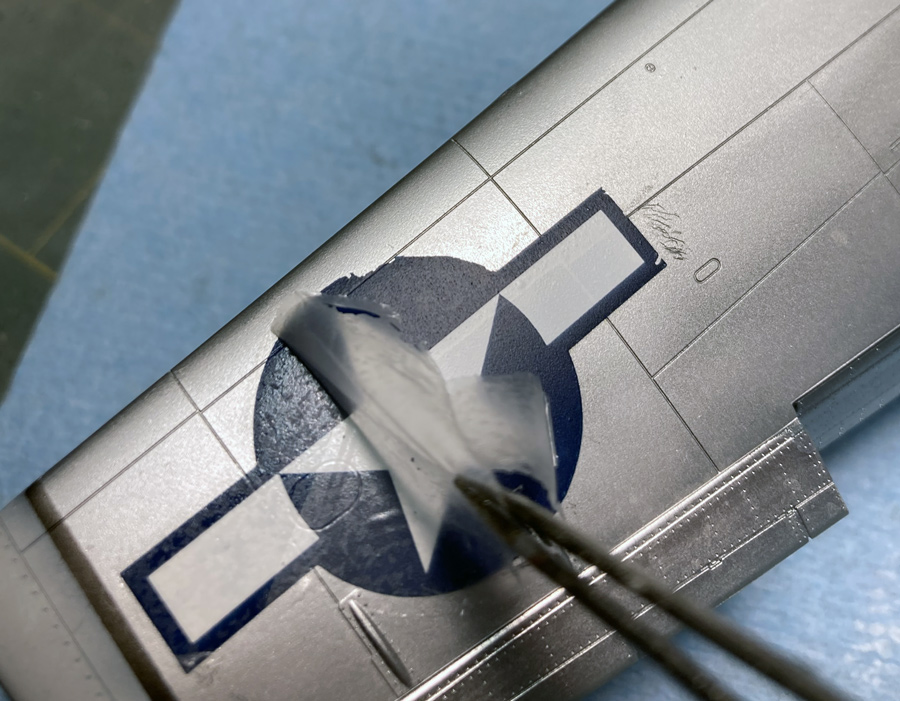
See what we mean? The outside of the decal was lifted by careful application of a sharp hobby blade, leaving tiny scratches in the wing that were easily polished out, but note the chipping visible on the blue areas of the decal. Yes, they look painted on in some areas, but we honestly think the system is a solution that’s not ready for Prime Time and quite possibly the answer to a question that nobody asked. The decals can be used without peeling that top film, of course, and they look pretty good that way too, but if you don’t peel the film your markings can suffer from texturing in the top coat which you can see in this photo if you compare the left and right sides of that corcarde. Most recent Eduard decals are like this and using them is very much hit or miss; if you go back through this blog and look at the F4F-3 we reviewed several months ago you’ll see that the kit decals were nearly perfect, while those that came with our Mitsubishi A6M3 Type 32 were almost unusable. Frustration, thy name is Eduard…
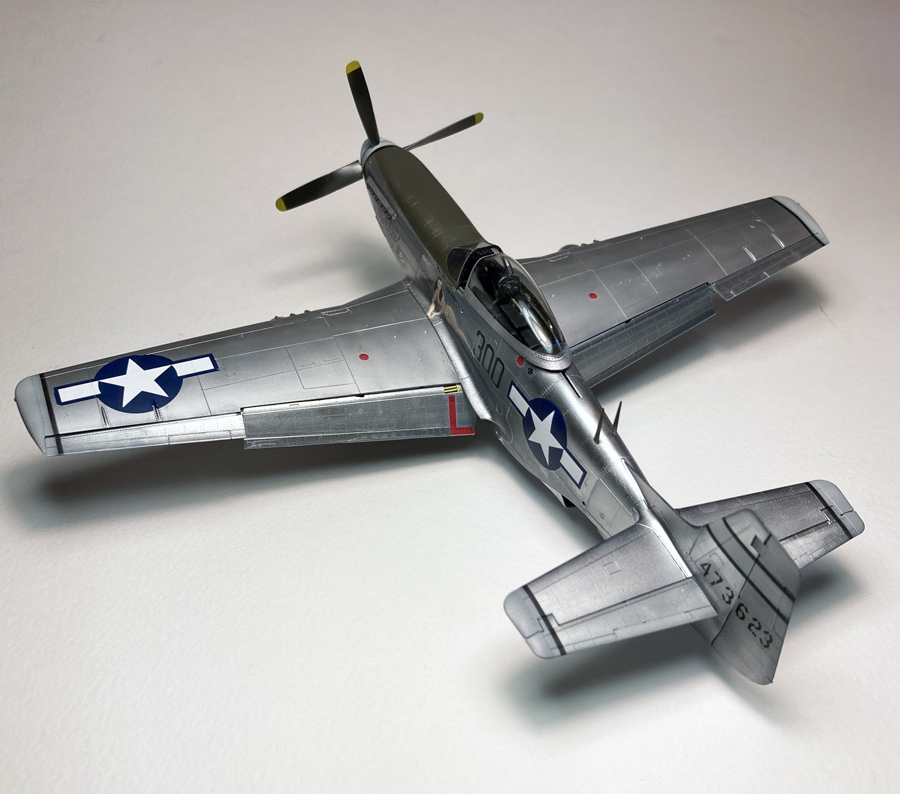
The finished model sure looks like a VLR Mustang, doesn’t it? And no, that flap position decal isn’t supposed to be where it is—it actually should be a little bit further outboard— but we won’t say anything if you don’t!
Now that we’re done, what can we say about this kit? For starters, it’s probably the best P-51D available from any manufacturer once we’ve factored in accuracy, fidelity to scale, detail, and optional components. Most importantly, it looks the part once completed. It’s superb. It’s also a bit of a learning experience, by which we mean it will improve your game regardless of your skill level, but you have to do your part because it’s most assuredly not a shake-and-bake sort of model and will take you to school if you don’t . Successful completion requires a degree of experience and skill that may not be in the wheelhouse of everyone who attempts the project but it’s an imminently buildable kit that will reward the experienced modeler’s efforts beyond all expectations. It’s not a Kotare Spitfire or a Tamiya P-38 but it’s in the same league as those kits. All you have to do is do your part!