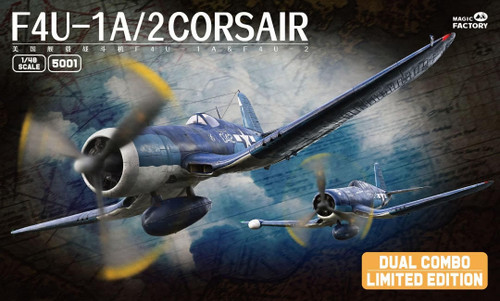
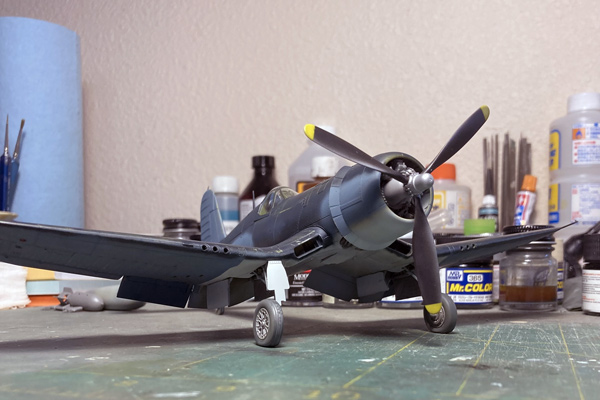
Magic Factory F4U-1A/2 Corsair, 1/48th Scale, Kit No. 5001 Part 2
By Phillip Friddell on 30th Mar 2024

Here we are again, rolling right along with our Magic Factory F4U-1A Corsair and we have to say it: This one’s a keeper. It isn’t perfect, mind you, but for a company that isn’t headquartered in New Zealand it’s a positively amazing first effort, one that puts this new, Where Did They Come From Anyway company right up there with the big boys. It’s a good kit. It’s a really good kit!
In our last thrilling installment we waxed somewhat lyrical about the pair of models residing inside the box, but we need balance as well so today it’s time to pick a couple of nits, or at least to identify a couple of things you might want to know about. In order to do that we’ll have to set a premise, though, so here’s one to consider. This boxing, which contains enough parts for two complete models, will allow the enthusiast to build an early F4U-1a, a mid-production -1a, a late production -1a, and a -2. The kit, as issued (and presuming you don’t go wandering off into the land of other variants), caters to the mid-production -1a (and -2, of course), but arriving at an earlier or later F4U-1A is a simple matter once we’ve examined the available references to see what needs doing—you WILL look at some references, right? You can also do a few things with the Goodyear FG-1A and Brewster F3A-1A series of airplanes if you’d like but that takes us past the scope of a basic review, so once again it’s off to the library should should one of those be the variant you’d like to recreate.
At any rate, here are a few tips to make life a bit easier, Corsair-wise, but it’s still a good idea to acquire some resources of your own to help things along. Please keep in mind that we’ve actually built the kit’s -1a variation but not the -2 that’s also in the box, so what follows is for the F4U-1a only. We’re also going to skip the comments and criticisms we had last time around and just concentrate on understanding the model a bit better.
First, the real Corsair’s radio antenna fit was all over the place location-wise regarding both antenna masts and the antenna wires themselves. Tommy Thomason, Dana Bell, and Jennings Heilig have all addressed the subject in detail and those antennae can be aircraft-specific. It’s worth knowing, eh?
The tailwheel strut can have two different lengths, with a longer one coming into play with Bureau Number 50080. It’s visible and makes a difference to the model’s “sit”. Pictures of the real thing are your friend…
That little doohickey on the leading edge of the starboard wing was a stall strip on the real airplane, added to cause both wings to stall and lose lift at the same time to improve handling around the boat, and appeared on the -1a early on. It’s probably going to be on your model, but maybe not if you’re doing a super-early bird, so a reference check is definitely in order there.

The kit supplies a landing light under the port wing but no other option, and that light went away with BuNo 17930 (FG-1A 13261 and F3A-1A 04592, if you’ve wandered off into Goodyear or Brewster country), to be replaced with a small approach light in the leading edge of the wing. In practical terms that means you’ll have to fill in that underwing hole for a later airframe and relocate the light. Doing that appears to be a pain at first glance but it will give you the opportunity, or force you; name your own poison, to do something with that overstated fabric ribbing as well—let’s call it a silver lining!
A well-intentioned kit “mistake”, or maybe not, involves the small teardrop shape below and just forward of the antenna mast that lives behind the canopy. The full-color markings sheet that accompanies the model shows it as a formation light but it’s actually an insulator for one of the various wire antennae that could be added to the airplane. You don’t want to paint it green like they show it and you may not want it on your model at all, depending upon the antennas you add. Pictures are your friend.
Most Marine and many land-based Navy Corsairs had their tailhooks removed in the field since they weren’t required away from the boat and added weight to an already heavy airplane. That’s an easy mod if the subject of your replica goes in that direction. Another easy thing to do while we’re discussing stuff affiliated with the landing gear is to pick a tire tread, ribbed or block, depending on what the airplane you’ve chosen to model was wearing. The Marines seem to have used primarily the ribbed rubber but tires are easily changed and you don’t want to get overly pedantic about it. Since the kit provides both types you’re home free on this one.
The clear window in the belly of the airplane should be painted in the interior color on its interior and the undersurface color on the portion you see when you turn your model upside down. It’s not an F4U-1a thing and went away early in the Corsair’s production so paint that puppy!
And that’s enough for now. We should be finished up with our” Hog” in time for our next issue so stand by one while we finish this thing up!

