
Zoukei-Mura Bf109G-14/U4, 1/32nd Scale
Posted by Phillip Friddell on 23rd Sep 2022
Let's begin this review of the brand new 1/32nd scale Zoukei-Mura Gustav kit with a correction and a caveat. The correction is obvious; by the time Messerschmitt began production of their G-14 series the airplanes were no longer identified as Bf109s but had become Me109s instead. That's a glaring error to be sure, and right off the bat as well, but it's also words and not plastic. We mention it only because someone else is bound to.
The caveat is pretty simple. This may well be the best kit of any 109 variant ever released to the modeling public, but it's probably going to end up being the model least built by the folks who buy one because of its parts count and the level of detail incorporated into it. It's superficially intimidating. It's also a easy kit to build if you play your cards right, and it's a kit that deserves to be built, although that may not be your first impression when you get your copy home and open up the largish box that your brand new Super Wing Series No. 18 resides within.
At this point you may well be asking yourself what's in that box that might prove worrisome to some folks, but that's a question easily answered once you start looking around. That kit box is absolutely crammed with parts requiring assembly! We didn't count them, because we never do that sort of thing, but there's a whole lot of polystyrene in that sturdy container. There's also a truly spiffy and, far more importantly, easy to follow instruction book comprising 55 pages and a great many steps which are broken down into logical and easy to follow stages. There's a nice decal sheet by Cartograph, although it only covers the markings for one airplane; a G-14/U-4 flown by Erich Hartmann. And there are parts. Lots and lots of parts.
It must be said, and it actually has been by a great many people, that Z-M kits are overdesigned and contain a lot of unnecessary detail that will never be seen by anyone. That's actually true, sort of, but their approach to kit design is radically different than that of most kit manufacturers, at least where the subject of this review is concerned, because the model's design mimics that of the real airplane. At first glance that's a Bad Thing because it seemingly overcomplicates the model, but then you realize that you can cement the fuselage skins, as well as the wing skins, to their appropriate formers and ribs without ever applying cement to an actual seam which in turn means your cleanup should be absolutely minimal. That approach is vindicated throughout the model, where detail that is normally ignored by the various kit manufacturers is included and actually visible.
Then there's that elephant in the room: The parts count. It's truly intimidating at first but all that goes away once you discover that this is not actually a kit of an Me109G-14, but rather a kit containing enough pieces to allow you to build a 109G-5, G-6, or G-14 as you choose and using only what's in the box (as long as you want a "true" Gustav with those classic bumps on the cowling). The instructions are extremely specific as to the construction of a G-14/U4 but the kit contains two windscreens, three canopies, three cowlings short and tall vertical stabilizers and rudders (but not the final rudder configuration with the Flettner tabs), two sets of wheels, alternate interior configurations, and a tropical filter along with the requisite umbrella bumps on the port fuselage under the cockpit. Follow the instructions and you'll get that aforementioned G-14/U-4. Go adventuring and this kit opens up any number of possible color schemes and markings combinations.
There are also several types of instrument panel to allow you to utilize your favorite technique when building the model. We tried the clear panel, painting it RLM 66 Grey and applying the instrument decals from behind the panel. That sort of thing is often looked upon as gimmicky but it worked out just fine in actual practice.
The G-14/U-4 had a 30mm cannon as its primary weapon and one is included, but there's also a more commonly found 20mm gun as well as weapon-appropriate cannon covers and floor panels for the cockpit. There are separate and distinct ammunition trays for the gun as well, for whatever that's worth. We didn't use either of them but maybe you will!
With all of that said there are truly a great many parts in the kit, and you really ought to make some attempt to follow the instructions, particularly since the model can either be built with everything opened up or with it configured as if ready for flight. You should also pre-fit everything and read each instruction step through before actually building anything. The parts just click into place---they're so precisely molded it's scary---but you have to pay attention when you're building this thing. You'll probably want to spend a bit of time pre-fitting the engine assembly into the nose regardless of the display configuration you choose and it's probably the most difficult thing you'll need to accomplish. You might also want to close up the trailing edge of the wing, which will already be pre-set because you've assembled the skins onto a spar and rib framework, after you install all of the various flaps found there. That's because of those tight tolerances and the inclusion of appropriate flap linkages with the model. In so many ways this kit is just like everything else you've built, but with a different approach to the basic design.
Nothing's perfect, of course, and there are a couple of issues you'll need to deal with as you go along. There's no photoetch in the kit at all, nor any resin for that matter, but there's also been no attempt to reproduce the rudder pedal straps or, far more importantly, the seat belts and shoulder harnesses. All of those things can be seen and really should have been included considering the kit's not inexpensive price point. There's an auxiliary fuel tank and the appropriate rack for it, but no optional bombs although a rack is included and there is a weapons panel in the not-for-use batch of kit components. Underwing 20mm gun gondolas are not provided, nor are those ungainly rocket tubes used by the RDV guys. The underwing Morane antenna, which is not used with the scheme provided in the model, is slightly too long. There's no canopy restraint, probably because there's no photoetch. There's no insulator standoff for the antenna wire that runs from the main antenna to the aft fuselage. Oh, and you have to fill in a few access panels ala the old Hasegawa Gustav.
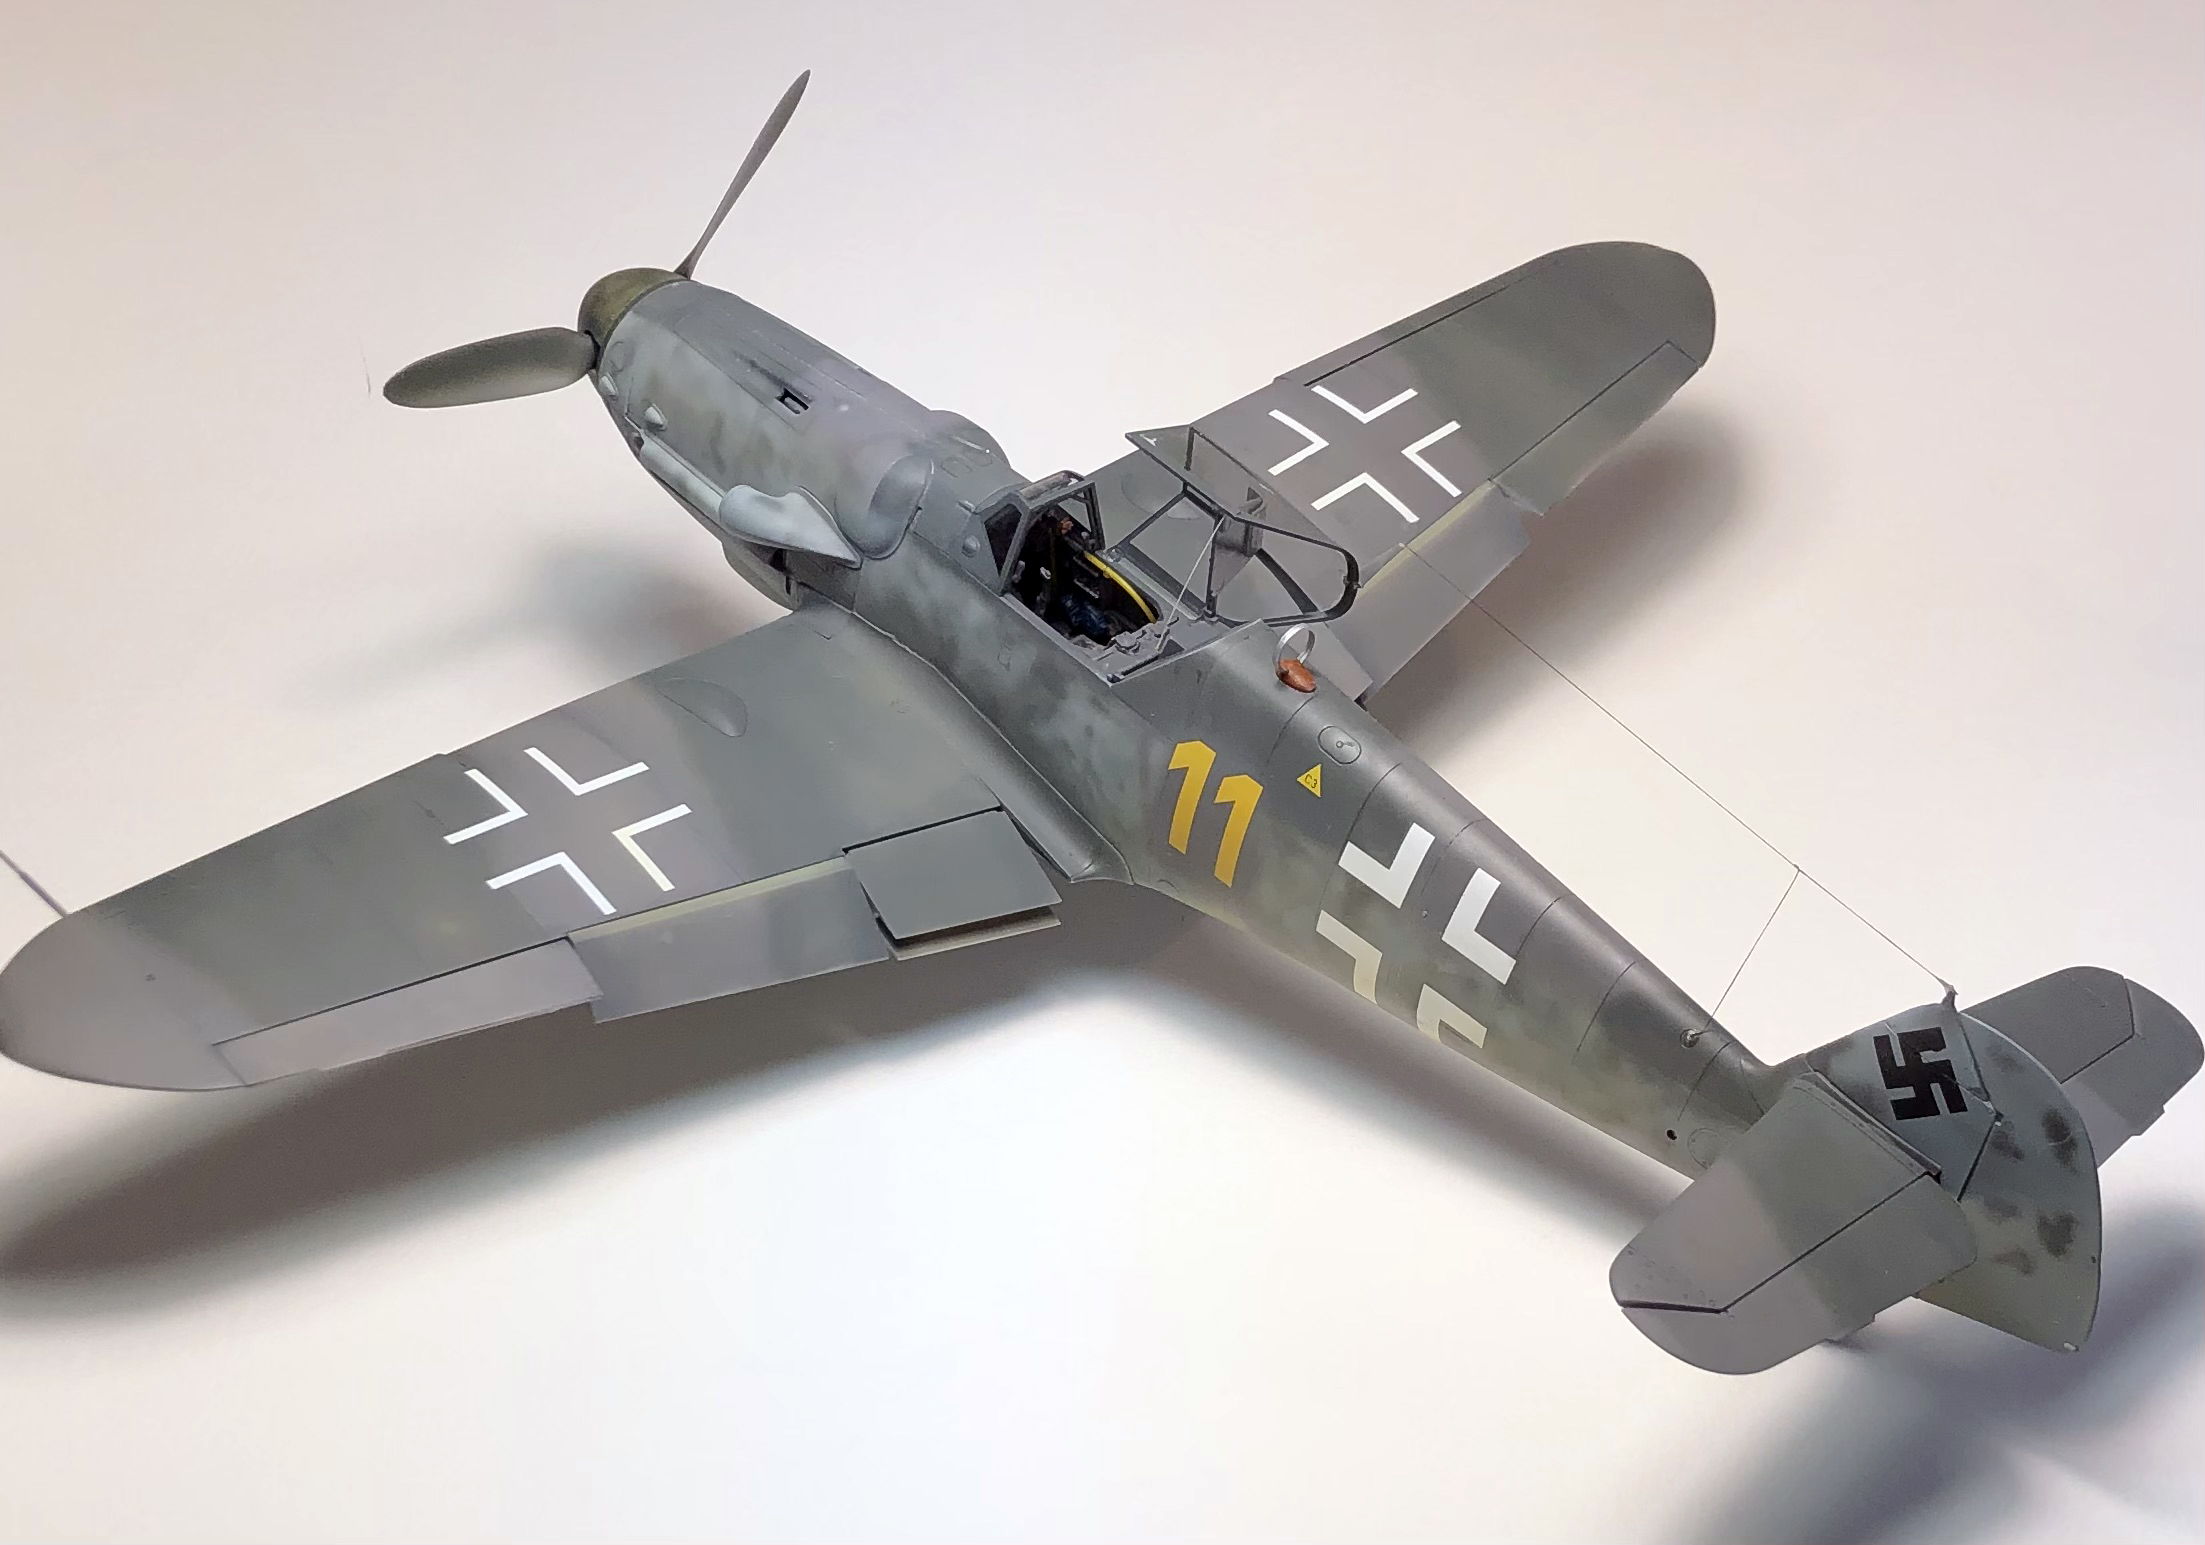
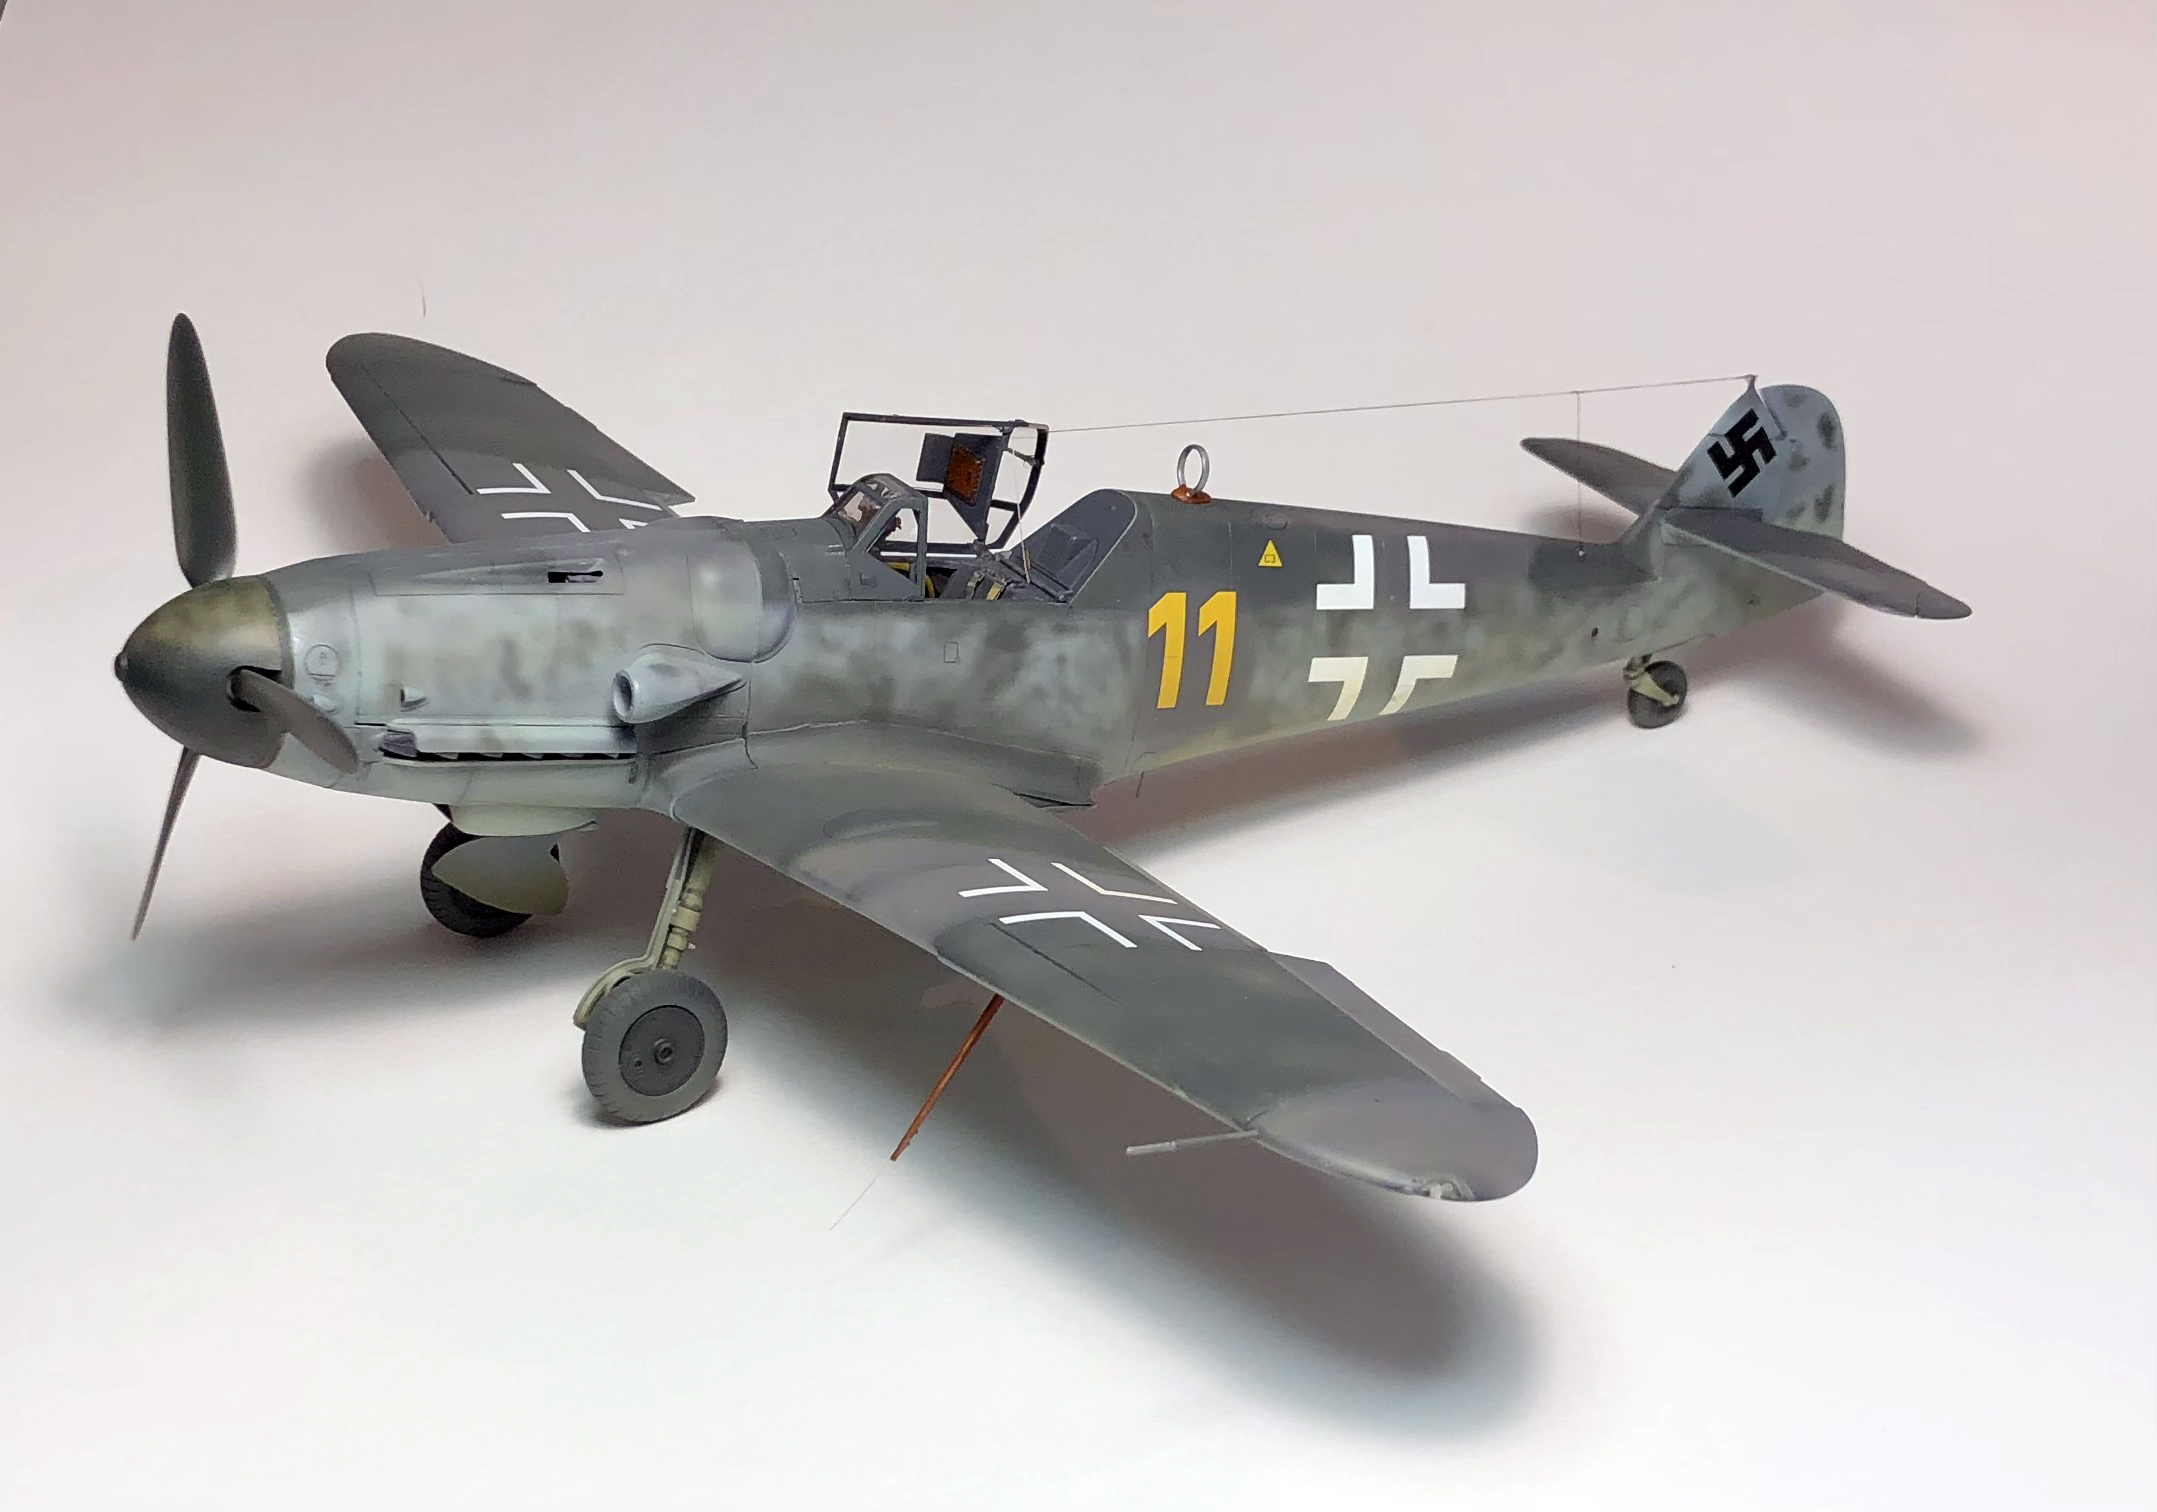
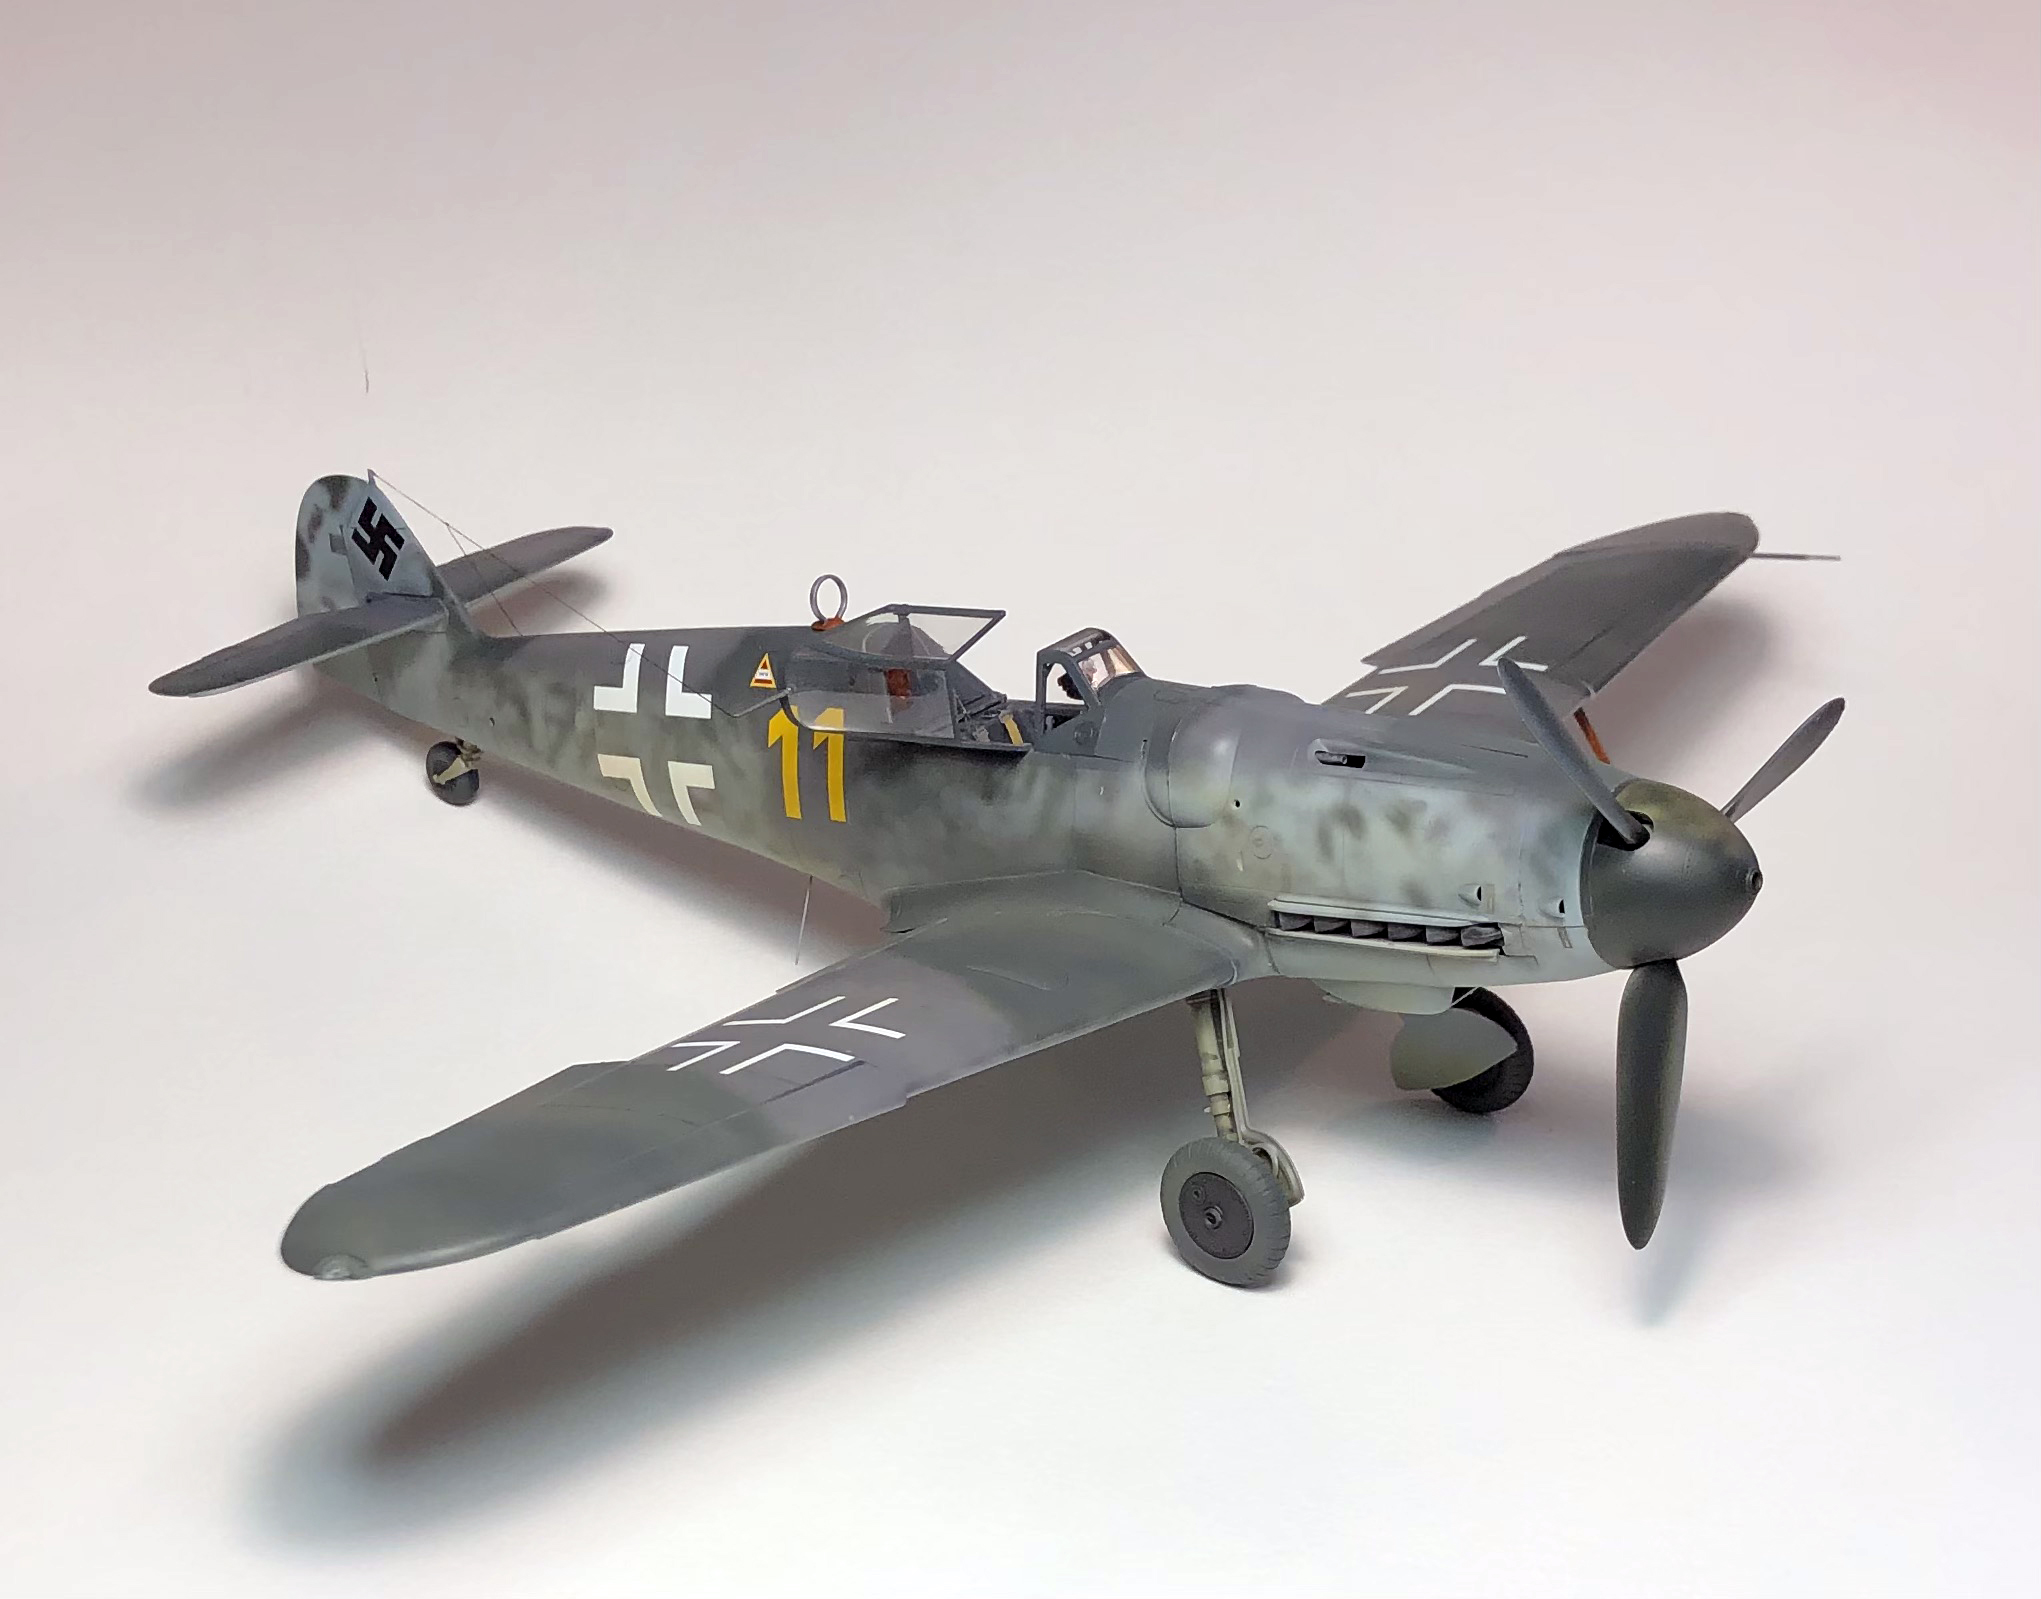
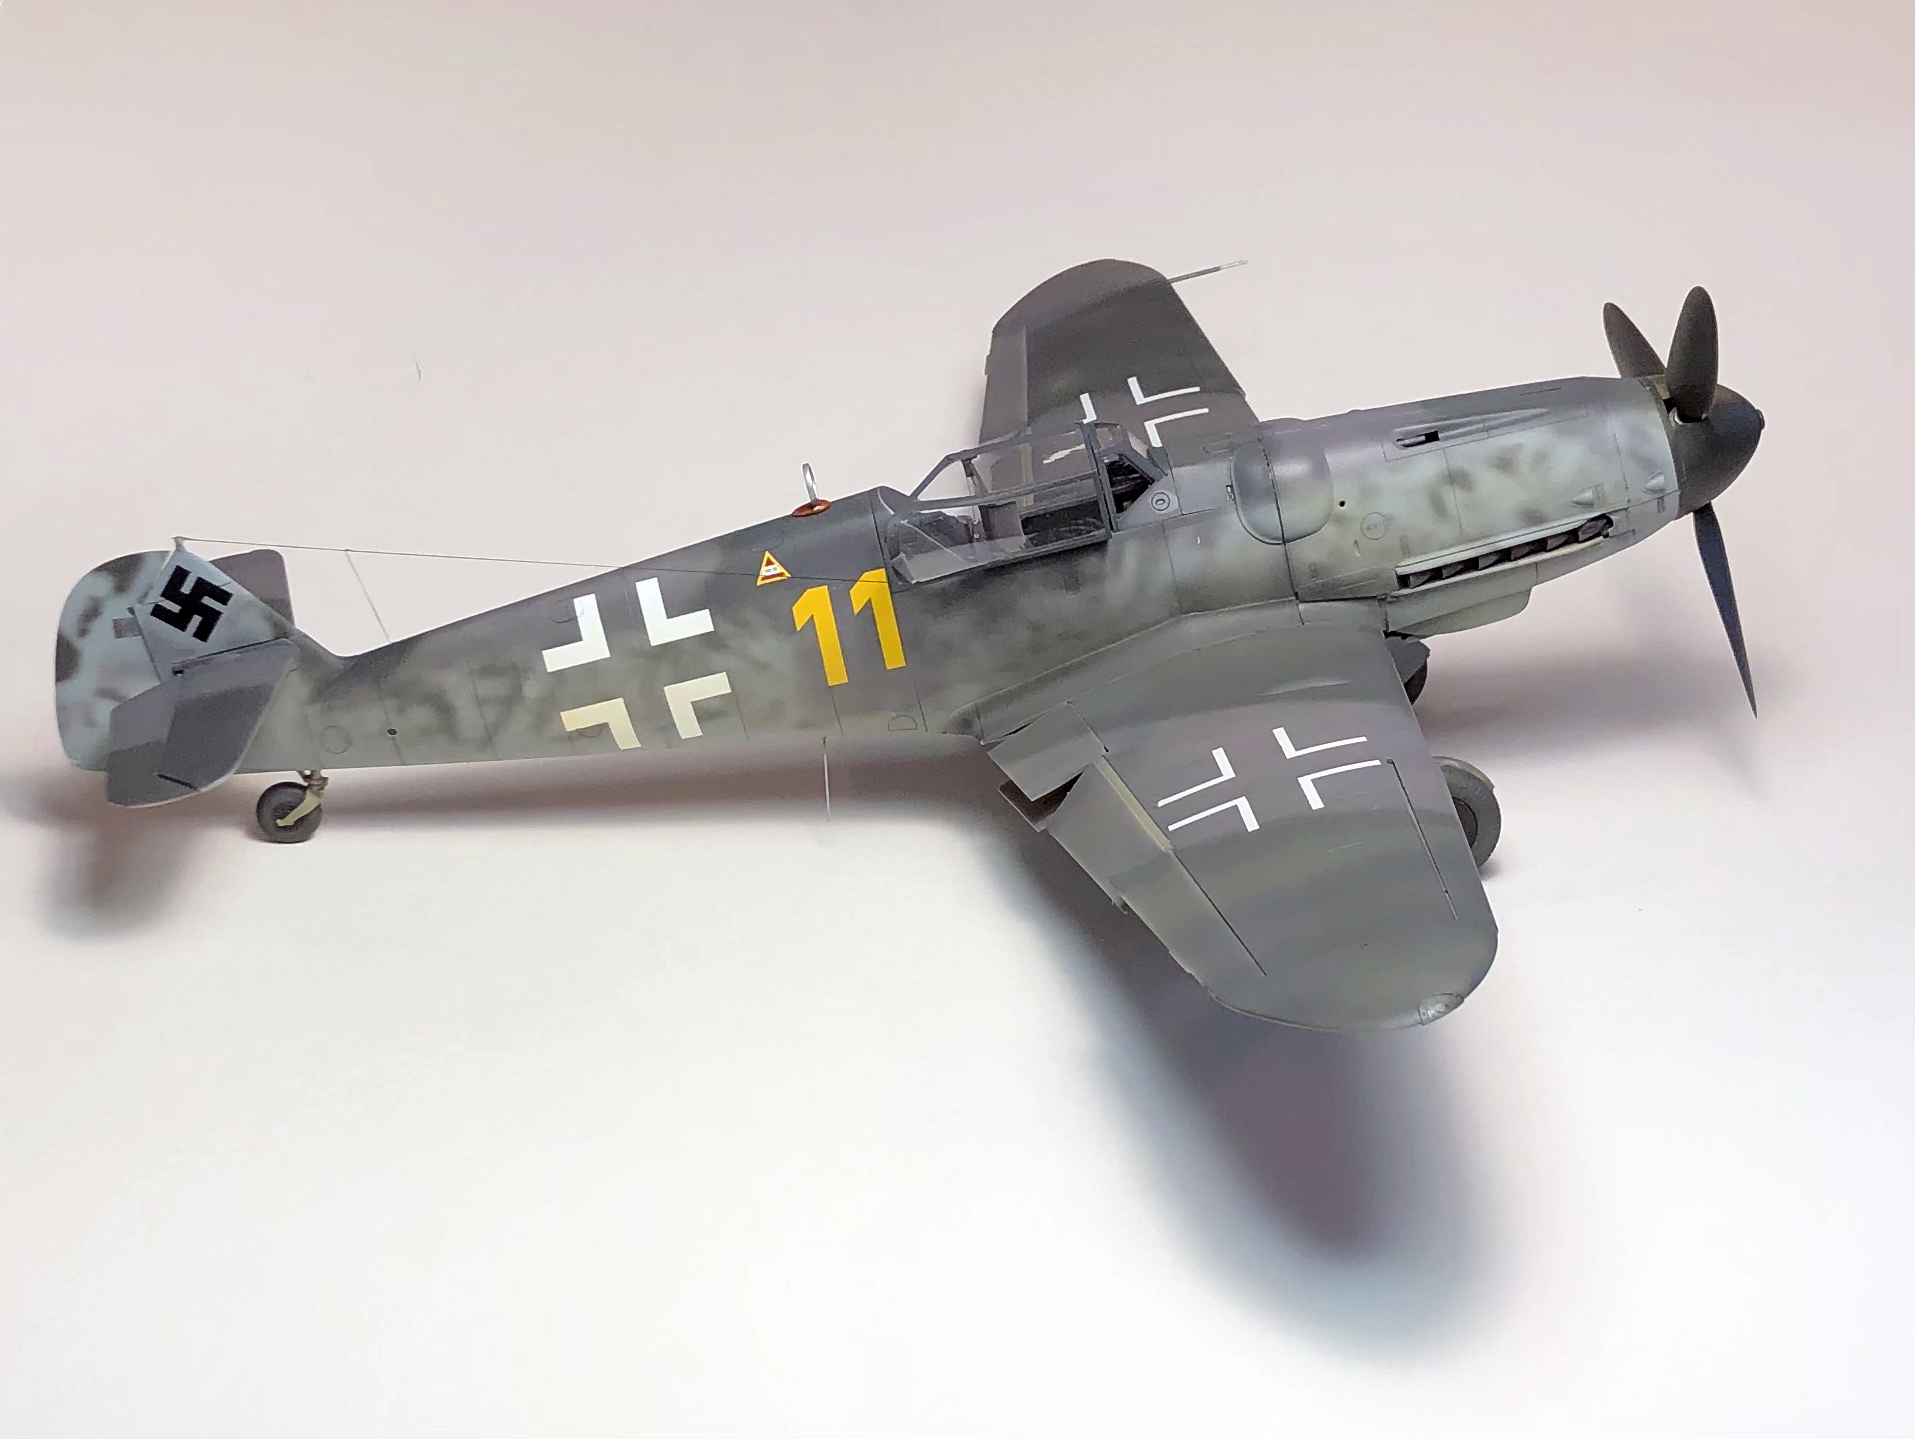
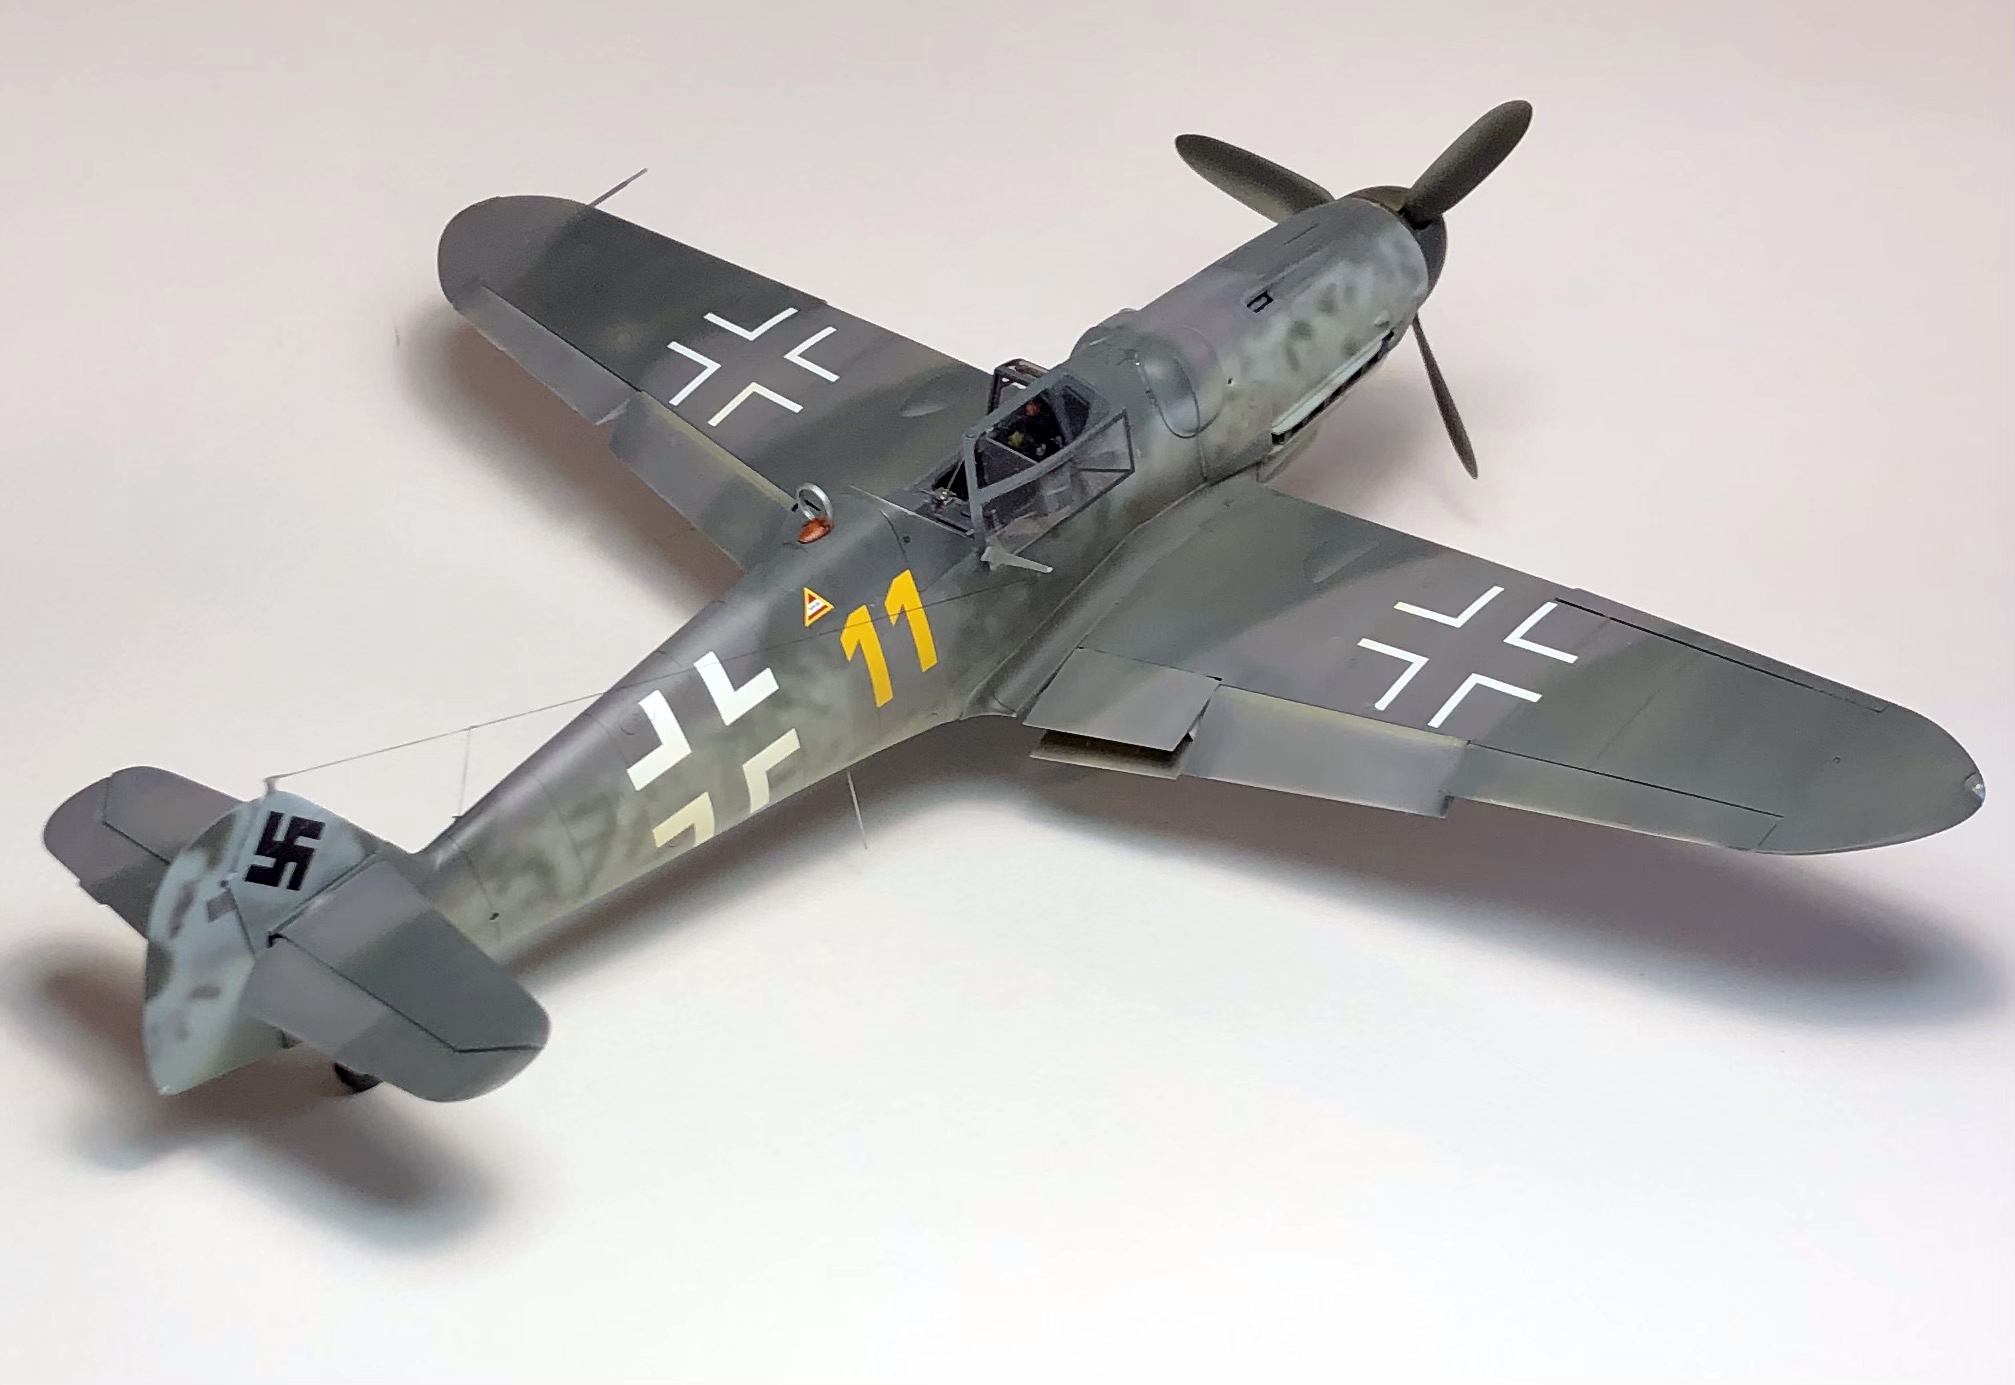
This version of the kit---we're sure there will be others to follow given the parts options---will allow the modeler to recreate one of Erich Hartmann's aircraft and nothing else. There's one set of markings provided, for his tulip-nosed "white 1", and that's it. The model, which includes a nicely sculpted resin figure of "Bubi", is a Hartmann airplane only, at least as purchased. Our review sample was built along a road far less traveled and represents a III/JG52 bird found derelict at Deutsch Brod in April of 1945. We did that because we liked the markings anomalies and because it wasn't a Hartmann scheme, although we have to admit we did use some of the kit's decals and they performed flawlessly.
So, is this kit worth its price, and is the complication really necessary? You'll have to make that price decision for yourself but consider this: Your present alternative to this kit is the increasingly long in the tooth Hasegawa offering, still a valid option but no longer king of the hill. Choose that Hasegawa kit instead, then upgrade the exhausts, wheels, and the interior with aftermarket and all of a sudden the Z-M kit becomes reasonably priced. There's truth in the too many parts and overly-complicated to assemble argument, but even that's only a matter of detail. Yes; there's an ammunition bin for the airplane's cannon rounds and yes, there's a tray of dummy rounds to go in it, as well as a lid for the thing. You don't have to use them, and you don't have to display the engine with the opened cowling option either, but those things are options. Do it. Don't do it. It's your choice.
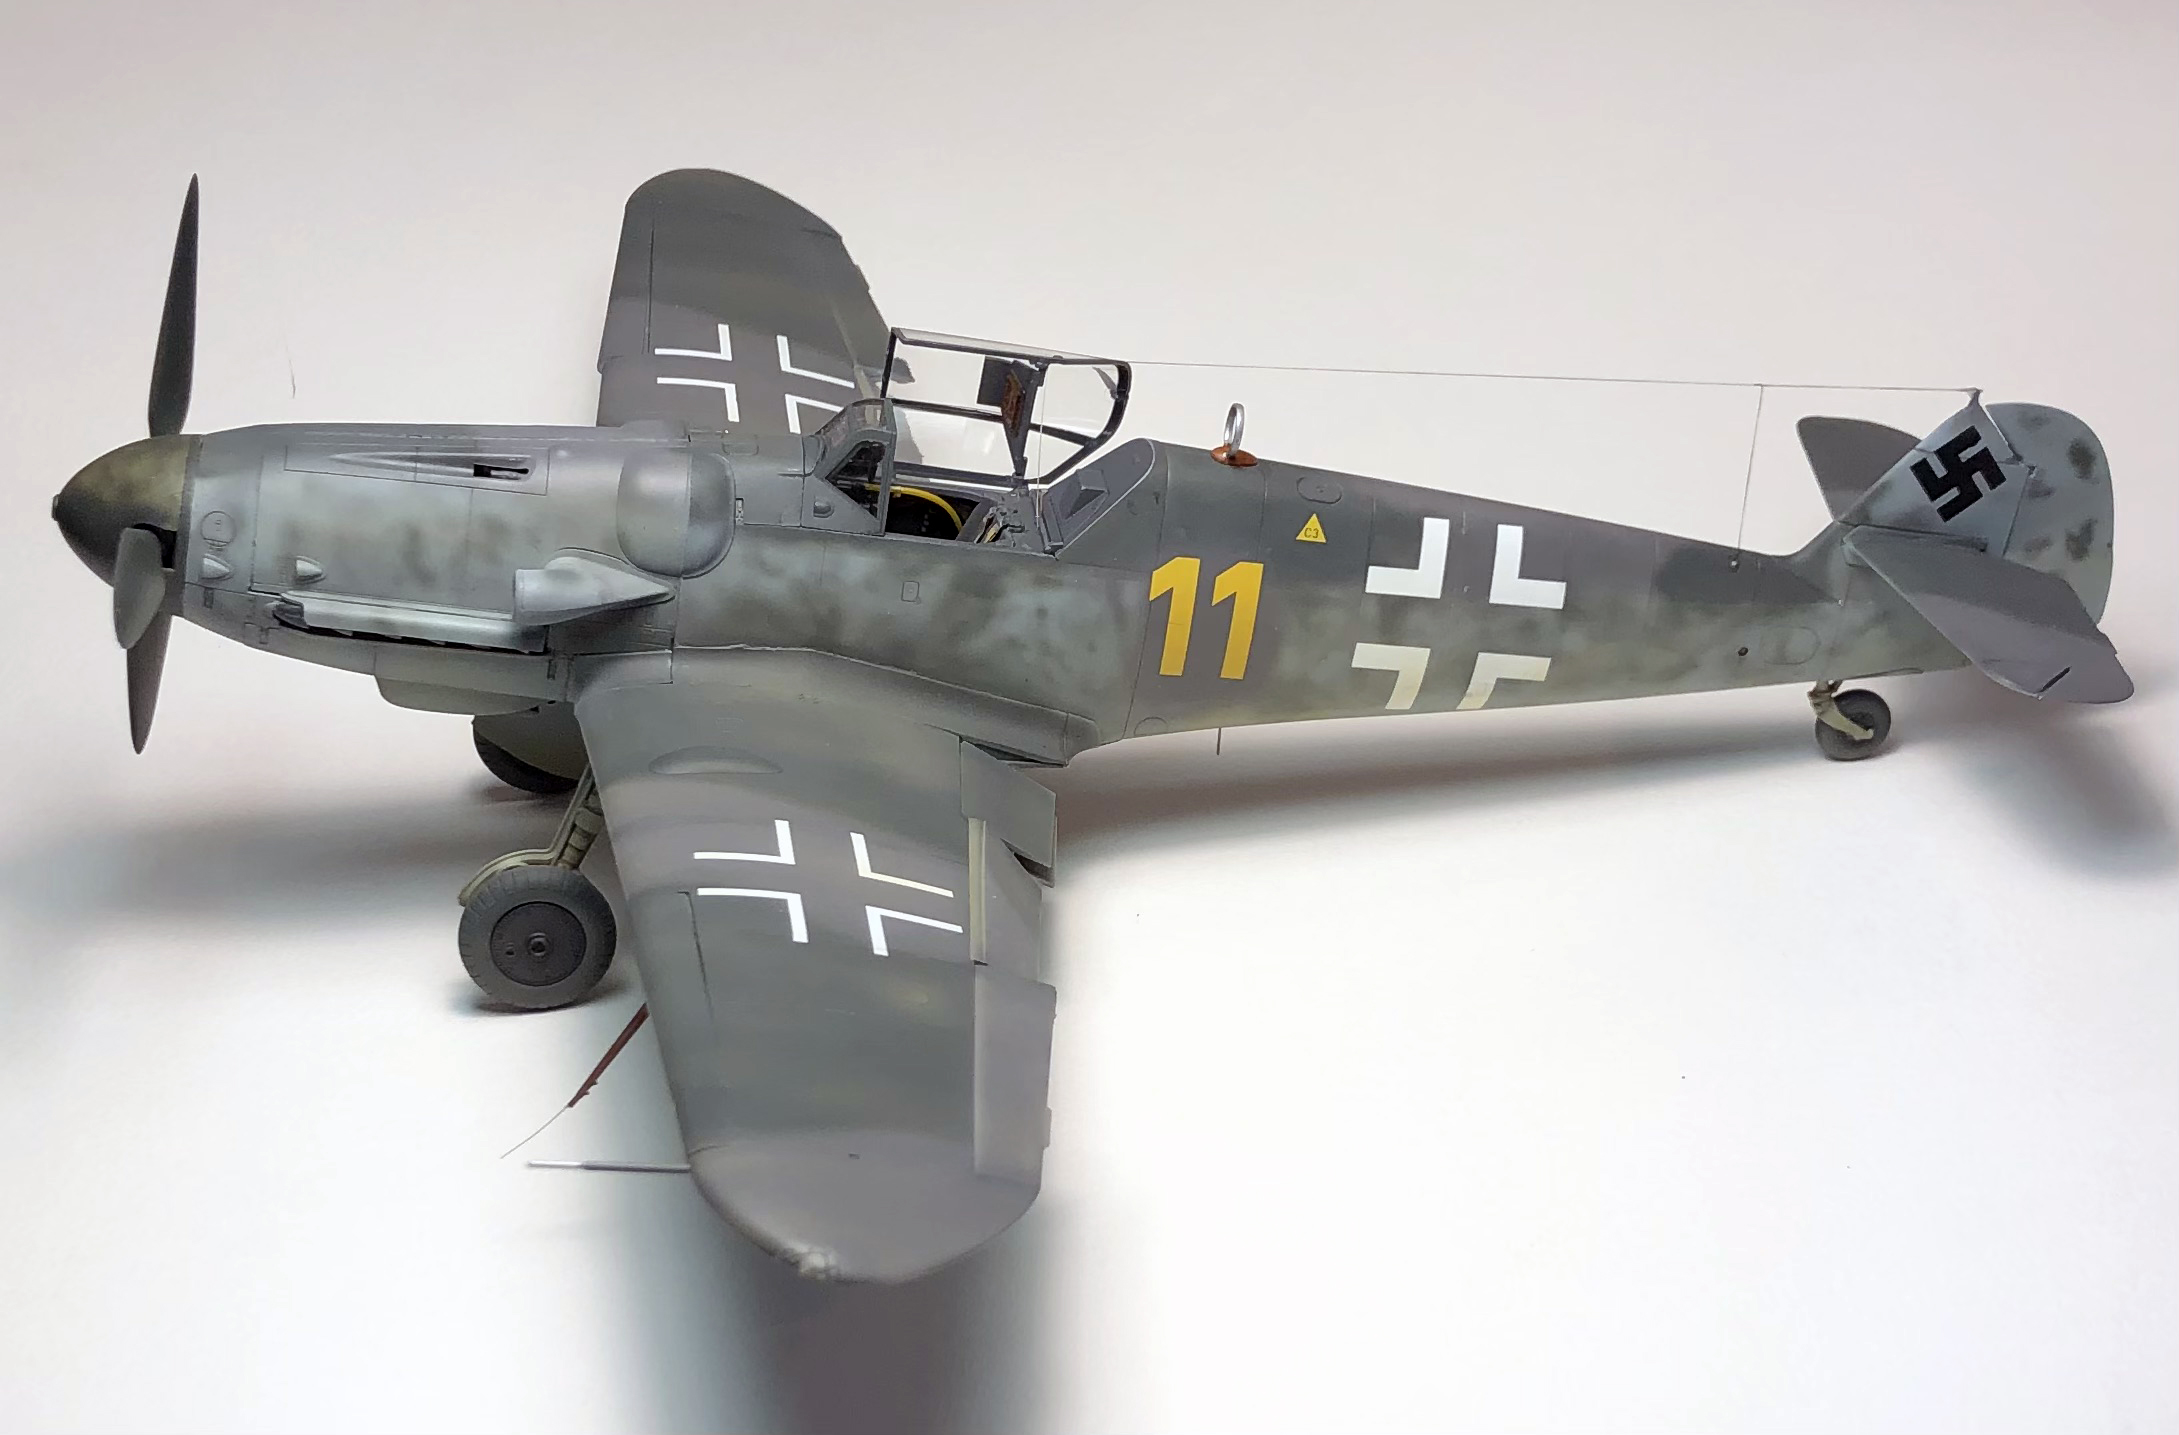
Finally, let's think about what's going on here. The kit is complicated but it's also perfectly buildable; we did this one start-to-finish in two weeks to see if we could. The optional parts in the kit allow the modeler to build several major variants and sub-variants, something we haven't seen since the late, lamented Monogram did that sort of thing back in the early 60s. The kit provides a set of canopy masks that are easily the best we've ever used. The dollar value in this kit is considerable and it is, pretty much without question, the best round-nose 109 model out there. It is expensive, and the older Hasegawa kit is certainly a viable option to it should that be your primary consideration. We found it to be an absolute joy to work with and were delighted with the finished result. That doesn't promise success for anyone else, of course, and we must reiterate that this is a complicated model at best and is definitely not for the beginner nor the impatient.
Thank you, Sir! May I have another?